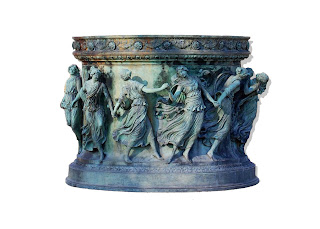
 Shadows offer a great way to add depth and dimension to otherwise flat objects. They can also help subjects stand out from similarly colored and textured backgrounds.
Creating simple, subtle shadows is easy.
First, to preserve the integrity of your original, it's always good to work from a duplicate. So to begin, press Ctrl-J to duplicate your original.
Now your layers palette is showing two layers. Your original and the duplicate.
Next, using the magic want tool, SELECT the subject you want to add a shadow to. (You'll know it's selected when the "ants" are dancing all around your object.
Once selected, go to LAYER-NEW-LAYER VIA COPY. At this point you will have three layers on your palette. The top layer should be just your subject on a checkboard background.
Now use Ctrl-J again to duplicate your cut-out. Now you have 4 layers. SELECT your object again on this top layer and paint it completely black with either the bucket or paint brush.
Next, in the layers palette, left mouse click on your blackened subject layer, hold and drag that level down one level. Now you don't see the blackened layer anymore. Next comes the magic!
With the blackened layer selected in the palette, use the arrow move tool to drag your shadow out from behind what is now your top subject. You should start to see the black appear as soon as you begin moving with the move tool (arrow). Place your shadow just a little offset, in a place where you would expect the shadow to be (opposite the lightest side of your subject.)
To make it appear real now, on the layers palette, adjust (reduce) the OPACITY of your blackened image to around 20-35%. It will now appear grey...like a shadow!
Ta-da! You did it.
The secrets here are you need at least three layers to make it happen. Your background on the bottom(1), your shadow in the middle(2), and your cut-out subject on top(3). The other secret is to reduce the opacity of your shadow to make it look real. And always watch/ examine your photo for how you would expect the light to create a shadow.
Once you've created the basic shadow, you can get fancy by using EDIT-FREE TRANSFORM to lengthen or distort your shadow layer. Remember that to create perspective (non-90 degree angles with the free-transform, hold down the (Ctrl) while dragging the corners. That will create a skew which can be used to make a really long shadow which reaches on to the horizon line.
Works great on text layers too. Can really make your words stand out. Something often needed when trying to write on multi-colored backgrounds. In that case, you can change your shadow to any color you chose to contrast with the surroundings.
BONUS! Use this three layer technique when you want to have kids or pets "peaking" out from behind things. Simply replace the blackened shadow layer with your child or pet subject. This "sandwich" method is the easiest way to insert subjects realistically into scenes. Because your subject is in-between you can move them around to the best position without trying to "cut" your subject in. Leave your subject whole, resize as needed to fit into the scene. Then, when you like its position, erase any parts of your subject that stick out where they don't belong.
Experiment...have fun. Go Photoshop something!


No comments:
Post a Comment