Saturday, May 30, 2009

Photos to Pencil Line Art


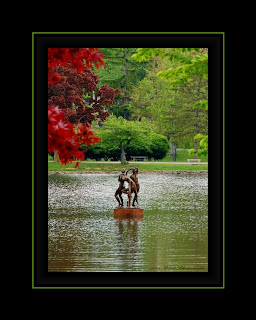
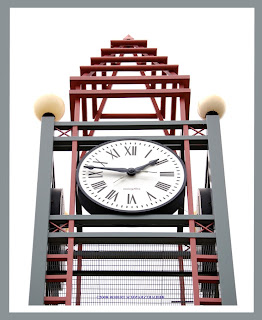
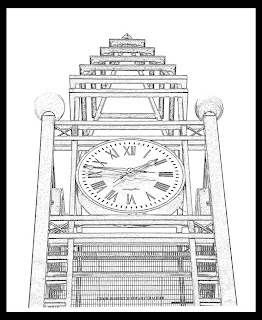
Here's an interesting and quick way to turn your photographs into pencil drawings.

Mind you, it works best with images that do not have a lot of texture to them. Textured areas tend to become just messy gray zones rather than lines.

To begin, DUPLICATE your image using Ctrl-J

Next, set the foreground color to black then choose,
FILTER - OTHER - HIGH PASS
and select a very small radius. The best radius will depend on each individual image, but generally it will be under 2. The photo above was done at 1.8.

Next, be sure your background color is set to white and go to:
FILTER - SKETCH - NOTE PAPER
and try setting your sliders to:
IMAGE BALANCE : 25
GRAININESS: 0
RELIEF: 0

Then, go to IMAGE - ADJUST - THRESHOLD and move the slider left to make the lines more defined, more black.

As a final step, use either the pencil tool or the brush, with the color set to white, to remove (cover over) any stray black dots that distract from the image.

It's a quick and easy way to turn your images into interesting line art works.

Friday, May 22, 2009

Memorial Day...Polaroid Moments


Happy Memorial Day!

As we remember to honor all the brave men and women who sacrifice much, if not everything, for their country - let us also be reminded to appreciate
all the freedoms we enjoy thanks to their dedicated service.

In order not to take anything away from the importance of honoring these heroes of the United States of America, let me just offer you a simple Photoshop, Polaroid style template into which you can place your favorite photos and possibly a caption which has meaning for you.

http://graphicssoft.about.com/od/freedownloads/ht/polaroidframe.htm

Have a great holiday weekend everyone!
Be sure you use your extra time to Photoshop something!

Clone as Copy & Paste Tool


"Blink!"

That should get about as good a result as "smile!"

Of course I'm being sarcastic. Shouting either of these
words at a portrait session will likely yield those strange,
contorted faces that always sell so well.

But what CAN we do when the proofs come back and
we see that perfect pose, where everything is just right,
except for the closed eyes? What can we do when we get
the blink in an otherwise good shot?

We might try to cut and paste an eye from a similar shot.
We might try to overlay an entire face from a similar shot
and try to twist and erase until we got an acceptable eye overlay.

Or...we might try to use an often overlooked method of copying...
the CLONE tool.

Did you know that you could open a photo, select the CLONE tool,
(doesn't matter what size here) then use ALT-Left Mouse Click
on any portion of your to photo to copy the entire photo?

Sure you can. And it makes for a really easy Copy & Paste method.
We clone (copy) from one photo and then "paint"(paste) it into another.

Here's what you do:

Open your two photos in Photoshop.
We'll use eyes as an example here.

On the photo with the good eyes (or whatever) chose the CLONE tool
then ALT-left mouse click on any portion of that photo.

Next, bring your second photo up to the front (active) position.
As always, DUPLICATE the layer to protect your original.
Then, on add a blank LAYER
Now with the blank layer active, hold down the left mouse button
and begin to "Paint" your cloned layer onto this blank layer.

"Paint" on as much or as little as you need. Don't worry though,
if you paint on too much you can just use the eraser tool to get rid
of anything you don't want.

Because we put the clone on it's own layer, we can manipulate it in many
ways without effecting our photo below. We can use free transform to vary
the size and position. We can vary the opacity if that is appropriate.

We can add a non-destructive Dodge & Burn layer to adjust the layers
for perfect blending.

Using CLONE as a copy and paste tool can be used to create many
different creative effects.

Try it...I think you'll like it!

Tuesday, May 19, 2009

"Pops!" With Gaussian Blur?


Sometimes, amazing results can come from unexpected places.

In fact, going to blur might be considered exactly what we don't want to use when we want to bring out the "POP" factor in our photos. We most often associate the blur with softening, not "popping".

But there's a hidden a secret in this method!

If you cannot already tell, in this tiger photo, the one on the left has been "popped!" while the one on the right is the original. You may click on the image to enlarge for greater detail - as is the case with all the photos seen in this blog.

Here is the simple technique revealed...

1. Open your photo and duplicate Ctrl-J (as always to preserve your original)

2. Go to FILTER - BLUR - GAUSSIAN BLUR and adjust the pixel radius so that you can still clearly see the shapes in your photo but still everything is sufficiently blurred. (in this popped photo the pixel radius was set to 15.8)

3. Here's the secret...change the blend mode on the layers pallet from NORMAL to OVERLAY!

Now is that simple or what! Try it out on your child and pet portraits, landscapes, everything!

Experiment! Instead of changing to OVERLAY, change to VIVID or HARD light. Vary the opacity.

ADVANCED: Want even greater control (as was used in this photo)? Then create a layer mask of the Gaussian blur and use the eraser to selectively apply the blur affect. In the case of the tiger, the darker regions of his face lost definition. Using the blur as a filter mask let me un-blur most of the face to preserve to detail but still create POP!

Gaussian blur to pop! It's in the cards for you.

Monday, May 18, 2009

Universal Contrast Correction


This is one of my favorite, high-speed fixes that has never failed to give me a better looking photograph. Never.

That is why I call it the universal correction. Try it on any photograph you have and see if you agree with me.

It is Part 1 of my 2 favorite quick-fix processes. The other was written about earlier in Better Sharpening w/ High Pass Filter. These two, easy to use processes, are my secret weapon for improving a whole bunch of photos fast, prior to adding any special effects.

So without further ado, here are the steps to Universal Contrast Correction:

1. Open your image and duplicate the background

2. Go to: IMAGE-ADJUSTMENTS-AUTO LEVELS
(this should instantly make your photo look quite a bit better, because it's basically what you would do yourself if you went in to fiddle around with levels and curves adjustments separately)

3. Use keyboard shortcut Ctrl-J to duplicate the newly adjusted layer

4. Go to IMAGE-ADJUSTMENTS- EQUALIZE
Whoops! Now your good photo looks like a bad HDR. But not to worry, we'll fix it back to good again in step 5.

5. Change the BLEND MODE on this layer to Soft Light and drop the OPACITY down to between 30% and 50% based on your own judgment of what looks best for that particular photograph.

6. Finally, go to LAYER-MERGE VISIBLE to complete the process.

Viola! You're done.

Now you've got a secret weapon that will mindlessly improve all your photos in under 60 seconds.

Universal Contrast Correction

Remember, if you need help getting customers for your photography business, if you want simple, proven ideas for marketing your photography services to earn cash...be sure to check out the latest book I co-authored with pro-photographer and marketing genius Dan Eitriem.

Volume 1 was a smash hit. Now, with Volume 2 and 17 more ways to be successful, the only way you can fail is if you're not serious about making photography a real, cash making business.

Click here to have a look-see (but be warned...once seen, you might not be sleeping tonight!)

Sunday, May 17, 2009

Sunday Shortcuts...The Finale


This weekend I was reminded of the seamless beauty of the circle of life. New lives begin, old ones die. With each loss opportunity awaits for life anew.

This is what happens when your favorite location for a photo-hike happens to be in a 260 acre cemetery!

But this is no ordinary cemetery. It is Forest Lawn Cemetery in Buffalo, NY.

Forest Lawn Cemetary. Buffalo History Preserved

Eternal resting place to a U.S. President, a rock star, countless millionaires, artists, world explorers, and pioneers of industry.

But it's not so much the who's but the what's that make this place special.
The what's include: a picturesque lake, rivers and bridges, over 200 species of birds, flowering trees, hills. Art carvings, stained glass, and bronze statuary well suited to honor these residents who have earned their place in history.

At this point you may be wondering,
"Bob, this is all very fascinating, but where are the Sunday Shortcuts?"

Which brings me exactly to my point.

As I pondered life's mysteries while watching and photographing this lovely goose with her new chick, a new life was hatched for Sunday Shortcuts as well.

Rather than dole them out piecemeal fashion, I can offer you printouts of ALL the keyboard shortcuts for your exact version of Photoshop. As an example, I have in my hand ALL the shortcuts for Photoshop 7...and it is a full two pages of 6 pt type!

Best of all...you can get your very own copy of ALL the keyboard shortcuts for your Photoshop version FREE with Pack 2 of the Photoshop Tip Cards.


But only through this special link:
http://tinyurl.com/cardsandbonus

Once I'm notified of your request, I'll send you a personal email to determine what version of Photoshop you are using. Then, I'll pull that Keyboard shortcut printout to send along with your Photoshop Tip Cards Pack 2.

So as we close the book on Sunday Shortcuts, as it fades from life, new life is given to the Shortcuts Printout.

I think you'll find it quite valuable. But since Photoshop House of Cards is about what's helpful for you, click on the comment section below and let me know what YOU would like to have.
And certainly...you can have both!

I'll never know unless you tell me! So be sure to leave a comment below.

But so you don't leave without at least one keyboard shortcut today:

When you turn ON the Caps lock, you enable precise cursor movement. That lets you have a finer control when using the MOVE tool. But here's a companion tip. If you forget to turn OFF Caps lock, your brushes will not be normal. They'll still work, but you won't be able to see the coverage area prior to the action...and you'll be scratching your head as to why.

Here's what you need to do:

1. Sign up today to receive your FREE Photoshop Tip Cards Pack 1 if you are not already a member.

2. Click on the link above to get Photoshop Tip Cards Pack 2 and the bonus Shortcuts Printout.

3. Enter your favorite Photoshop'd photo into the contest that ends this week

4. Leave a comment below

Read the previous posting if you are hesitating to do Steps 1, 2, 3 or 4

Have a great week!

Coming MONDAY: Fast and Furious Contrast Correction- A Universal Fix


Friday, May 15, 2009

If Today Was Your Last Day...


As I cruised down the road today, in my early morning commute, a song came on the radio which colored my thinking for the day. It colors my thoughts now, even as I write this blog entry.

The song is by a group named, "Nickelback"
and is titled, "If today was your last day"

You might find it here at this link on Youtube, but no guarantees because the record label seems to be chasing it down for removal. But you could always "Google" the lyrics.

Click here or copy and paste the link below to hear the song.
http://www.youtube.com/watch?v=StbWZz4pF88&feature=related

As the title implies, it's about taking stock of what you are doing in your life now and what you would be doing if you knew the end was near...like TODAY!

How often do we just wake up into our daily ruts and go mindlessly along the tracks we create in our lives? As if, like the innocent children seen here in today's photo, we imagine life will just automatically be better tomorrow.

But will there be a tomorrow? If so, how many more?

I hope one of the reasons you are here, reading this now, is because you want to become better. Better at producing high quality photos. Better at Photoshop skills. Better at workflow speed. Which will hopefully lead you to better compliments, better customers and better cashflow.

But often times we get caught up in the learning mode (to which I plead exceedingly guilty!) and forget that what we need to do, is DO!

Most importantly, if we are not where we want to be, what SHOULD we be DOING that will bring us closer to our goals?

So today's Photoshop tip is to be sure you DO, not just read through!

Try each tip. Experiment with the sliders, the dials, the deep, deep menu options.

Click on the links at the right of this page if you haven't already. Click on them again and DO something if you just were looking last time. Each posted link is a resource I have personally used to increase my photography skills and increase my income. Each has been tested, proven and receives my highest recommendation as something I feel will be helpful to you too.

When you have done that, get those photos out of your computer and out into the world!

Enter contests, (my contest ends next week so submit your photos!) show your portfolio to prospects, submit your photos to forums for review, or at the very least, get them printed, matted, framed and up on your walls!

Promise yourself you WILL do SOMETHING different today!

Because, God forbid, what IF today was your last day?

Today, I rearranged my schedule and instead spent the day with my Dad, out in the sun helping him rebuild his porch steps. Priceless.

Thursday, May 14, 2009

Better Sharpening with High Pass Filter


What's Everybody Looking For?

A better way to sharpen up those images, that's what!

While just about everyone is familiar with using the UNSHARP MASK to sharpen up their photos, there is another less well known and often more effective method.

It is the HIGH PASS FILTER

There are two main reasons why HIGH PASS can be better.

1. UNSHARP mask operates on all of the pixels in your photo. It works by making changes to those pixels...therefore it can be categorized as a destructive process, much like the dodge and burn tool.

2. UNSHARP mask takes the broad approach to sharpening, sharpening everything. Unlike HIGH PASS which limits its process to the edges where the most obvious benefits can be seen from sharpening.

Try this HIGH PASS FILTER method the next time you need a little sharpening done:

Step 1: Open you image and duplicate the background (Ctrl-J)
Step 2: Add a (blank) layer to the top of your stack
Step 3: Ctrl-Alt-Shift-E, this fills your top layer with a flattened version of your background
Step 4: Set Blend Mode on this layer to OVERLAY
Step 5: FILTER- OTHER- HIGH PASS
You'll get a pop-up box with a slider (for Radius) which will have a preview of your image. Slide that slider left until you can only see gray values (no colors) in your preview.
The "sweet spot" will be around the point where you just make the colors go away to see only an outtline of your image and gray. (Usually this radius is way under 10, more likely between 1.5 and 3.5)

That's it! You're done!

To check your results, toggle on/off the high pass layer. You can also bring the opacity slider for this level down to zero and back up to check. Even set the opacity for your own taste.

And there you have it! An alternative, non-destructive option for sharpening up those photos.

Here's a bonus! You can also spot tune your sharpening for more or less effect in certain places by using a 50% gray brush to increase/decrease the effect in particular areas as you desire.

Go ahead and monkey around with it now so you don't forget!

And so you'll have this tip on hand next time you need it, be sure to get signed up for my Photoshop Tips Card Group...its FREE! Plus, new members will receive a very helpful set of Photoshop Tip Cards free when they sign up. These helpful index cards include all the tips you need to crank out great photos every time. Best of all they sit right beside your computer so you don't have to waste time searching online for the tips you need.

Also, be sure to enter the MEMBERS ONLY PHOTO CONTEST going on now.
You'll get full details in your email when you sign up.

Sunday, May 10, 2009

Shortcut Sundays...for Lazy Cats

"Look me in the eye(s) and tell me you don't want to get things done faster!"

I'm quite certain the cat's motto is, "Why do any more than you have to."

It is in that spirit that we continue on with another edition of Shortcut Sundays. Because why should we do more than we have to in Photoshop?

1. Quickly zoom to 100%: If you double-click on the zoom tool (looks like a magnifying glass, just above rt. to the color palettes) the magnification will go to 100%

2. Precise Cursor: When you engage the "Caps Lock" key the cursor switches to precise movement.

3. Background Color: by default, Photoshop brings up a grey background upon which to do our work.

Sometimes, because of the edge color on our photos, the default grey is not the optimum color to be working on. Or, maybe we just want to be seeing OUR favorite color in the background as we work. Well, making your default background any color you wish to is easy as 1-2-3:

1. Choose a color from the color palettes, have it in the foreground position.
2. Activate the Paint Bucket.
3. SHIFT-CLICK
anywhere outside of your workspace (not on your photo working area) and the background color will switch to whatever color you have chosen.

4. Quick-Change Brush Tool Opacity: To quickly set the opacity of your brushes, you can use the keyboard numbers (just above the letters, not off to the far-right on your keypad) (to increase by 10% increments). For example, once you have activated the brush tool,
PRESS the number 1 key to set brush opacity to 10%.
PRESS the number 2 key to set brush opacity to 20%
PRESS the number 3 key to set brush opacity to 30% ...
and so on , all the way up to pressing 0 to get 100%.

Well there you go! Another Shortcut Sunday Photoshop Session has ended. Go and piece to create another phabulous Photoshop phenomenon!

I'll be announcing a photo contest later this week, open to members of my Photoshop Tip Card Group only. Be sure to sign up today to join our group if you're not already a member. Then you'll be on the list to receive all the details too, and be eligible for valuable prizes. Current members can just sit tight...details will be coming to you soon.

Friday, May 8, 2009

Getting Customers, Keeping Them Happy


Today's Photoshop tip is a bit different, but equally valuable. I know it's valuable because it answers two of the most common questions photographers ask:

1. How can I get more customers, and...
2. Where can I find a reasonably priced lab that won't screw-up my prints.

After all, the motivation most of us have for bettering our Photoshop skills is $$!

When we're better we can charge more.
When we're better we can get more customers.
When we're charging more AND getting more customers, we're making more money!
And if we can find a good processing lab that saves us money and hassle...

Now we've got a GREAT BUSINESS!
And that's the connection today's tip has to Photoshop.

Actually it's two tips today. The two great resources you've been asking for:

First: How can you get more customers?

Veteran photographer and marketing expert Dan Eitriem has just released Volume 2 of his enormously successful book, "How to Pay the Rent With Your Camera...This Month!"

Volume 1 was packed with great tips on how to get more customers into your business at very little cost. But Dan's a great marketer and he knew there were even more ways photographers could get customers. So, once again, Dan approached photographer's, asking them to reveal their best customer getting tips. And sure enough, he got tips to fill an entire book... Volume 2 was born!

I've been a big fan of Dan's marketing genious for quite a while now. Bought just about all of his stuff and loved it...because it works! Dozens of proven ways to get customers, with little or no cost marketing methods...methods that "real people" can actually do. Even me!

Volume 1 was great, I bought it, I loved it. Volume 2 is just as good if not better.

And if you like my tips here, you might just enjoy (and profit from) the one tip of mine Dan thought was so good he even included it when putting together Volume 2 of "How to Pay the Rent With Your Camera...This Month!"

You'll find that tip on Page 32 of his book, and not anywhere else but in Dan's book. So yes, if you buy his book I'll get a small percentage from Clickbank, but you'll get so much more when you put even one of his 17+ methods to work!

So tip one is: Want more customers? Get Dan's book.

Second: Where Can I Get Great Prints at Great Prices?

You could spend hours and hours, using all your Photoshop skills to create the finest photos, but if your monitor calibration is off your prints are going to come back looking awful. Or if the kid down at the photo lab is just dumping your photo files in to print, you could get back garbage.

- Wouldn't it be nice to know that each and every one of your photo files was being looked at on a carefully calibrated monitor prior to printing?
- Wouldn't it be nice to know that if the color or exposure was a bit off trained technicians would adjust it prior to printing?
- And if you could get fast turn-around, fast deliver, and freindly folks to deal with would you be tempted to learn who's doing this?
- And if I told you their prices were better, in many cases, than anything you could get locally would you just about kill me if I wouldn't tell you who they were?

Not to worry! I'm here to help.
And if it makes you feel any better, I get nothing for telling you about them. We are not affiliated in any way - except that they do my prints and I am happy to pay them.

You can get more details about them from their website: http://meridianpro.com

Tip Two is: Great prints, great prices at http://meridianpro.com

Photoshop is a great tool for improving our end results. But if we can't get a good print, at a good price, and someone to sell it too...what's the point?
Thursday, May 7, 2009

TEXT...Triple Tip Thursday


Get excited today because I've got 3 great tips for you!

The first two will greatly enhance your text work and the last tip will greatly enhance your bank account!

First Text Tip: Changing the font size of text can often be a hassle. Moving the mouse around, clicking, and/or manually typing in font sizes until you get just the right size. Who needs that?

Here's a keyboard shortcut...press 3 keys together, Ctrl-Shift-> to increase the font size at 2pt steps. Press Ctrl-Shift-< to decrease the font size at 2pt steps. If you want to move at larger increments, add the Alt key to move at 10pt increments. So that would be 4 keys together: Ctrl-Shift-Alt-> to get 10pt larger with each hit.

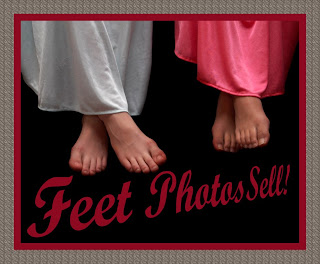
Second Text Tip: If you want to get creative with the shape of your text layer, for example like the perspective view in today's photo, you must first change the text layer into a shape layer. This is done only after you have perfected your text for font size and spelling because once you convert the text layer to a shape layer you can no longer change the individual text characters.

Here's how to change a text layer into a shape layer: With your type layer active, go to LAYER-TYPE-CONVERT TO SHAPE. Once you have done that you can go to EDIT-FREE TRANSFORM and now you will see the changeable box form around your text. Now just drag it around to the shape and size you desire and click ENTER to lock in the change. Remember that to asymetrically change sizes, hold the Ctrl key while dragging in/out your corners to create a perspective view like the one shown today.

Third Tip: As my subscribers and regular readers know I'm a huge fan of Scott's NewPhotoBiz 1.0 One of the great surprises in his material is that photographs of feet sell...big time! Can you imagine taking a picture of children's feet and then selling it for over $200. Scott shows you step by simple step how to do it... over and over again! Parents love showing off this unique style to all their friends! If you haven't already checked out his program, do it now.

Click the colored NewPhotoBiz 1.0 link above or over in the right margin and discover even more secrets to making big bucks with your camera and these Photoshop tips!

Wednesday, May 6, 2009

Shadows that Trail Along...w/Ctrl-E


Here's a small but important tip for anyone who is creating shadows of the kind I've shown how to make on previous postings. (As opposed to the ones we hate to get when taking photographs in the first place!)

The problem I see happening is when you want to reposition your subject AFTER having made the shadow.

Since we have been creating shadows by duplicating our subject layer, blackening it, reducing opacity, move tool to offset, etc., etc., the problem comes when we move our original subject - the realistic shadow we created does not follow along (because it is on a separate layer).

Fortunately, the solution is simple! Ctrl-E

Ctrl-E (keyboard shortcut for LAYER-MERGE DOWN) will combine your shadow layer and your subject layer into ONE layer. Simply select the layer which is on top (orig.subject) and then do a Ctrl-E to merge it down together with your shadow effect.

Now being one layer, when you want to move your subject, the shadow will trail along.

Not just for shadows, whenever you have two or more items you want to be able to manipulate as one group, use Ctrl-E to merge your two (or more) layers together. (Since it will only combine one layer with the one directly below it, combining more than 2 layer will require more than 2 Ctrl-E operations)

In today's photo, once I combined the matchbox with the shadow, I could duplicate it over and over and position each one wherever I want on the photo.

Tuesday, May 5, 2009

Faster Cut-Outs

One of the great features of Photoshop is that you can cut out parts of one photo and paste them into another.

(And you can make a lot of money doing it! I'll tell you how at the end of this post)

Or you can just cut your subject out to get rid of the background entirely, as was done in today's photo.

So we agree, cutting is good and useful.

But we might not always agree on the best way because there are so many options. Some harder than others.

1. We could use the eraser tool to slowly and carefully erase all around our subject, hoping we don't accidentally erase something we didn't want to. Not recommended for large areas.

2. We could use the lasso tool to select the edges of our subject by carefully guiding our mouse along the edges. A relatively imperfect task, made a bit easier when the magnetic lasso tool is employed.

3. We could use the magic wand to select our subject. But the magic wand selects based on similar color/tonality. But by holding the SHIFT key and left mouse clicking we could eventually select all the colors/tonalities within of our subject.

4. We could use the magic wand tool on our background. In the case of the photo shown here we would left mouse click in the black area around our subject. Because it is a uniform, solid color it will automatically avoid all of my subject. Then go to SELECT -INVERSE. Now instead of the background being selected, my image is. Now I can lift my lady out of the black by choosing LAYER-NEW LAYER-VIA COPY (or CUT if you prefer)

When your background is more uniform than your subject, selecting the background and then inverting your selection can be a faster, if less obvious, solution many times.

To be efficient, we ideally look for the fastest way. #4 is clearly the easiest and fastest way with this photo here.

It's easy to get confused, have tunnel vision when approaching a task. Doing things the usual way, the way we are comfortable isn't always the best way. A little time spent thinking about all the possibilities before diving in can often be time well spent.

Having your Photoshop Tip cards on your desk to flip through can give many time saving ideas.

Now if you want to make lots of money just cutting babies and pets out of photos and putting them into the cutest scenes, look in the right margin, or click here for Scott's, NewPhotoBiz 1.0

It's a great way to earn extra income, or even full time income using your camera. Best of all, it's recession proof! People love their pets in good economies and bad. And last I heard, they're still making babies all over the place!

Monday, May 4, 2009

5 Photoshop Tips for Cinco de Mayo


Happy Cinco de Mayo!

There are several techniques going on in this Photoshop tip for today. In honor of this special day I have included 5 techniques.

Can you guess how many have already been discussed in previous posts?

If you guessed 2 you would be correct.

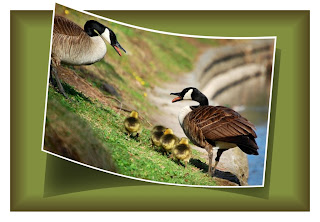
#1 The green base was constructed using the same method as in "Fool-proof Frames and Mats" except that here I did not delete the center where the photo would usually go. I left the entire layer intact with the border edge giving it a little 3-D effect. The green base is one layer.

#2 The shadow under the curved photo was from the same technique show previously in "Simple Shadows" where we duplicate our subject to another layer and then blacken it and reduce the opacity to around 50%. In this photo, a little Gaussian Blur was added to the shadow to help feather the edges a touch. The shadow was then flipped vertically (Edit -Transform - Flip Vertically) and moved into a realistic position under the subject.

#3 The third element is adding a white border to the subject picture. To do this just take any photo and...

-Duplicate your layer as always,
-Press the letter "D" shortcut to set your color palette to black foreground/white background
-Go to IMAGE - CANVAS SIZE - (once here change your measuring scale from inches to pixels for both the height and width
-add 50 to 100 pixels equallyto whatever height and width values are shown (your preference on how much border you like to have)
-click OK and you're done. A nice white border around your pic!
(If it turns out your border is black, it's OK! Just grab a bucket of white paint and dump it on the border to change the color...it's easy to forget to change the color palette first)

#4 Bending things. An easy way to bend things is to go to FILTER - DISTORT - SHEAR
The downside is that it will only bend from left to right, not up and down. In that regard you may have been fooled by the Mother Goose photo shown here. Since SHEAR will only bend from left to right, in this case it was necessary to first ROTATE the canvas 90' clockwise before using the FILTER-DISTORT-SHEAR feature, and then rotate it back after completing the bend.
( The shear function is like curves in that it has a line you can bend and mold to all sorts of shapes which will then create the form for your image)

#5 Creative Composition. Remember that the awesome power of Photoshop lies in the layers. Create, compose, stack, blend, mix and match! Bring several techniques together.

One of the easiest ways to create quick compositions is by having Photoshop Tip Cards on your desk beside you. There are so many tips, techniques and cool things you can do...but only if you can remember them! If you have to go surfing the net to find tutorials every time, you're not going to be very productive.

Photoshop Tip Cards solve the problem! Index cards that sit quietly beside you, ready to help when you need inspiration, or just a subtle reminder when you can't seem to remember the crucial steps.

Get a FREE set today! Sign up to join our tip group!

And, if you'd like more detailed instructions on how to create bended, shadowed photos, just drop me an email request (subject line: Bending) to robert@totalfitnessphotography.com

Sunday, May 3, 2009

Shortcuts Answer Your Prayers for More Time

Welcome to another edition of Shortcut Sundays!

Today brings many more Photoshop keyboard shortcuts, shortcuts which can be the answer to your prayers for more time.

Each keyboard shortcut can often save 2, 3, or 4 clicks of the mouse, plus your time reading pop-up dialog boxes which may appear at each step.

While one shortcut may not seem like that much of a time-saver, over the course of an entire photo project they can really add up.

Maybe all of them won't be useful for you, but the repeated use of the ones most commonly used in your work will make your life easier...help you get back some of your precious time.

That being said, here are today's Shortcut Sunday tips:

X switches your foreground and background color palettes
B brings up the brush tool
T brings up the text tool
J brings up the healing tool
W brings up the wand tool

Ctrl -Tab when you're working from several photos at once, your desktop can get pretty messy. Using this shortcut lets you quickly switch between layers

Ctrl -Shift-N adds a new layer to your work and includes the dialog pop-up box

Ctrl - Shift - Alt -N adds a new layer to your work instantly, without the dialog pop-up appearing

That's it for today's Shortcut Sunday tips. Be sure to try them out immediately while fresh in your mind. Even if you don't think you'll use them, by trying them just once or twice you may find that you'll remember them at just the right time in the future when you need them.

And for the ultimate Photoshop memory tool...be sure to sign-up for the FREE Photoshop Tip cards. Then, when you're stumped and wasting time because you want to do something but can't remember how, you can simply leaf through the tip cards setting beside your computer to find the answer.

No Google searching! No flipping from site to site! No interrupting your workflow!

If you really want to get through your Photoshop edits in the fastest possible way, and learn new tip and tricks to add pizazz to your photos...get your self a FREE pack of Photoshop Tip Cards today. Sign-up today!

And for even more great resources to help build your photography skills and profits -be sure to check out the other links located along the right side of this page. Personally used by me and tested for value, you'll find excellent opportunities for growth in the resource links provided.

Friday, May 1, 2009

100 Percent Clear

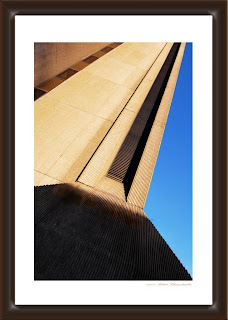
Be like the tall building... reach for the sky!

Short post today (tonight). Got to rise early for my daughter's First Communion service tomorrow. And there's still miles to go before I sleep! So here we go...

Ever found yourself scratching your head as to why your photo will look nice and sharp at one percentage, say 25%, and then when you zoom up to 75% or 95% to do some detail work it gets all fuzzy, all pixelly, all jagged?

It's a Photoshop thing.

Photoshop uses its full pixel power at 100%, 50%, 25% and 12.5 %. At these percentages you will see what you'll get.

Intermediate percentages, those which fall between any of the numbers shown above, like 33.3% will not include all the pixels. That is why your image may appear a little fuzzy at that size, but then it looks good when you move to 50%.

Photoshop stores in cache the full pixel preview at the 100, 50, 25 and 12.5 percent ratios. By not showing/storing for every ratio, memory is conserved and speed is optimized.

So if your adjusting for clarity or sharpness, be sure your ratio is set to one of the 4 full-pixel points...100%, 50%, 25% or 12.5 %.

There you go. Another Photoshop mystery solved.

Remember to pop on back for "Shortcut Sunday" where I'll share more secret keyboard shortcuts to speed your work along.

And, be sure to sign-up (in the top right corner) for the Photoshop Tip Cards group.

In addition to receiving a FREE set of cards, next week I'll be announcing a new book that I've co-authored with another photographer who just happens to be a brilliant marketer. If you're looking to boost your income along with your Photoshop skills, you won't want to miss it!
Sign-up now so you'll be the first to know!

by Robert Schwarztrauber