Showing posts with label income. Show all posts

Thursday, June 18, 2009

7 Profitable Photoshop Plans

Today I'm going to offer something a bit different.

Every once in a while you have to stop and think, "What's the point?"

Having all these great Photoshop tips at hand is a wonderful thing. But many of us are looking for ways to earn more money in photography. Luckily, the two go hand-in-hand.

You can use everything you learn in Photoshop to begin earning more money from your photography.

Here are 7 tips to get you thinking:

1. Add creative borders to your prints.
There is a reason people put thier most important photos into frames with mattes. It's because they look better! And naturally things that look better can sell for more. Fortunately, adding creative frames in Photoshop is not difficult (I've shown that in a previous post) and best of all it costs us nothing but a few moments of our time.

2. Adjust your exposures, sharpness and contrast
This is a bit basic, most of my readers will already be using Photoshop for post-production touch-ups on their photos. But for newbies, I can't think of one professional photographer, no matter how expensive his camera or how great his skill, that isn't using Photoshop or a similar editing software to create just a little bit better photo to sell his/her client.

3. Add Special Effects
How about adding a little vignette (soft border effect) to your photos? Maybe a little background blurr to make your subject stand out? Some shading? Text perhaps? A little color alteration or maybe add a few morew clouds in the sky? Maybe straighten the horizon. Maybe you want everything to be in black and white except some special feature? These can all help you collect more bucks for your pics with no expense but your time.


4. Cut and Paste your subjects into cute scenes
One of the most powerful features of Photoshop is that you can cut subjects from one scene and seemlessly paste them into another. Scott's NewPhotoBiz 1.0 is an amazing program for doing just that. Putting babies onto flowers, hugging fishbowls, and into washtubs can even allow you to make a great full time income from your photography. With all the different scenes and backgrounds available now, you charge for three or more scenes all from one photo! That's 3x the money!

5. Give your subjects "Extreme Makeovers"
With tools like the healing brush, gaussian blur and sharpness controls you can make skin tones flawless. No more pimples, moles, or scars! Tools like Liquify can turn frowns to smiles or make those big noses smaller. Even suck in those big guts making your subjects instantly look 10lbs. thinner. When you make your client look better than they ever imagined, you my friend are a true professional and will be rewarded accordingly.

6. Design your own business cards and flyers
I had struggled for years with other programs to create business cards and flyers. Boy was I surprised when someone flipped the switch in my brain by telling me that I could use Photoshop to to combine words and pictures (duh!). But until Scott from NewPhotoBiz 1.0 told me I never made the connection to creating business materials. With templates available from Vista Print and others, you can design your own custom materials and save a bundle.

7. Create unique custom greeting / holiday cards
Your profits don't have to end with the photo session. Once your client gets his 5x7's, 8x10's and 16x20's you should be coming back to him often throughout the year with more things to sell him from your original works. Turn those photos into greeting cards like the one shown in todays photo. Thanksgiving and the Christmas holidays should your cue to get a custom card order out to your clients. Offer them postcards, keychains, coasters, tee shirts, golf balls, mugs, water bottles, blankets. None of this stuff has to be pre-ordered by you. There is no expense to you except to make the offer and there are many promotional site that make this easy. Cafepress
is just one site to look at for possibilities. Or start your own store!

Photoshop can be a powerful force that drives more profits into your business. For more ideas on getting the most from Photoshop and photography be sure to check out the other resources at the right on this page, in particular NewPhotoBiz 1.0.

Tuesday, May 5, 2009

Faster Cut-Outs

One of the great features of Photoshop is that you can cut out parts of one photo and paste them into another.

(And you can make a lot of money doing it! I'll tell you how at the end of this post)

Or you can just cut your subject out to get rid of the background entirely, as was done in today's photo.

So we agree, cutting is good and useful.

But we might not always agree on the best way because there are so many options. Some harder than others.

1. We could use the eraser tool to slowly and carefully erase all around our subject, hoping we don't accidentally erase something we didn't want to. Not recommended for large areas.

2. We could use the lasso tool to select the edges of our subject by carefully guiding our mouse along the edges. A relatively imperfect task, made a bit easier when the magnetic lasso tool is employed.

3. We could use the magic wand to select our subject. But the magic wand selects based on similar color/tonality. But by holding the SHIFT key and left mouse clicking we could eventually select all the colors/tonalities within of our subject.

4. We could use the magic wand tool on our background. In the case of the photo shown here we would left mouse click in the black area around our subject. Because it is a uniform, solid color it will automatically avoid all of my subject. Then go to SELECT -INVERSE. Now instead of the background being selected, my image is. Now I can lift my lady out of the black by choosing LAYER-NEW LAYER-VIA COPY (or CUT if you prefer)

When your background is more uniform than your subject, selecting the background and then inverting your selection can be a faster, if less obvious, solution many times.

To be efficient, we ideally look for the fastest way. #4 is clearly the easiest and fastest way with this photo here.

It's easy to get confused, have tunnel vision when approaching a task. Doing things the usual way, the way we are comfortable isn't always the best way. A little time spent thinking about all the possibilities before diving in can often be time well spent.

Having your Photoshop Tip cards on your desk to flip through can give many time saving ideas.

Now if you want to make lots of money just cutting babies and pets out of photos and putting them into the cutest scenes, look in the right margin, or click here for Scott's, NewPhotoBiz 1.0

It's a great way to earn extra income, or even full time income using your camera. Best of all, it's recession proof! People love their pets in good economies and bad. And last I heard, they're still making babies all over the place!

Wednesday, April 29, 2009

LEVELS: Secret to Pin-point Accuracy

In the previous post on CURVES I made mention of my Photoshop workflow process. Many of you wrote asking me to describe my workflow so I thought I would do that today.

Since I described the third step in my process, CURVES, a bit already, today I'll work backward and describe a little tip on my second sequence in processing, LEVELS.

First, to give you the playbook, I always begin optimizing my photographs in Photoshop this 3 step way:

Ctrl-J to duplicate the background so I'm not working on my original. It's automatic to me, a must do, so I'm not even giving it a step number.

1. CROP: Here I compose the photo. Getting the subject where I want it and getting any clutter or distractions out of the picture. More on CROP tomorrow.

2. LEVELS: I use the histogram in LAYER - NEW ADJUSTMENT LAYER - LEVELS.
Today I'll give you a neat trick that lets you optimize your levels adjustment to retain all the pixels.

3. CURVES: After cropping to size and compose, after using LEVELS to set the proper exposure I next move to CURVES to give a little more sharpness and contrast to the photo. On rare occasions I will vary from this, but mostly my curves adjustment will look like this:


Using these three steps lets me very quickly improve the visual and technical qualities of 80% of my work. The other 20% will need some blemish repair, maybe a little more hue, maybe a little more sharpness, maybe a little Gaussian blur on the background to highlight my subject.

I don't include specialty stuff here, like subject transplants, or creative works like the statue in the previous 2 posts. And of course fun stuff like Scott's NewPhotoBiz 1.0 . But those project all still start out with my 3 step process. Crop, Levels, Curves.

OK, OK! Today's tip on LEVELS.

Often times when you open the levels window, you will see that histogram does not run complete from left to right (aka, dark to light). Maybe it doesn't reach to the dark side, which means you need to move the left slider arrow towards the middle to darken your photo. Maybe the histogram doesn't reach to the right side which means you need to drag the slider arrow toward the middle to lighten your photo.

But if you move it too far, you begin to let pixels drop off. You inadvertantly loose the lightest or darkest values. Sometimes, that's ok. But what if you want to keep everything?

Here's the tip!

Hold the (Alt) key down while you move the sliders.
Watch your photo now as you move the sliders.

If you are moving the right (lightest) slider arrow your photo will start out as black. As you move it left, towards the middle of the histogram to lighten your photo, you will begin to see a light appear from your subject. As soon as you see the first light, stop. That is the lightest pixel.

If you are moving the left (darkest) slider arrow your photo will start out white. As you move the arrow right, towards the middle of the histogram to darken your photo, you will begin to see colors appear. Stop. At that point you are revealing the darkest values in your photo.

There you have it. Now you know exactly where the lightest and darkest values lie on your photo. That's not to say it's bad to go past that point. It's OK to knock a few pixels off if it makes for a better photo in the end. But at least you won't inadvertently be losing them because you GUESSED where you should put the slider. now you can KNOW!

Be sure to sign up for my Tip Cards at the upper right of your screen. In addition to getting a FREE set of Photoshop Tip Cards for handy desktop reference, next week I'll be letting my Photoshop Tip Card Members in on a new book I co-authored with another very well known photographer and marketing expert.

In the book you'll discover great new ways to boost your photography income
(or even get yourself started in this great business with very little expense!)

Go ahead now...SIGN UP...it's free!

And tune in tomorrow for more CROP!

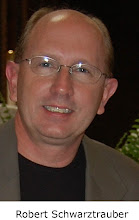
This is Robert Schwarztrauber, signing off to go Photoshop something.