Need a planet...fast?
Or a tie dyed shirt?
Quick background?
Here's the fastest way
to get everything you need
with just a few clicks.
First, on your color pallet, select two contrasting colors.
Here I used a light and dark blue for the rear. A light and dark red-ish color for the front orb.
Once you have those, open a new layer and use:
FILTER > RENDER > CLOUDS
If you needed a quick background you can stop here. You have it.
If you needed an overlay for some clothing or perhaps a little sky character, you can stop here too. It's just that fast!
If you wanted a planet, there's one more step.
Go to FILTER > RENDER > LIGHTING EFFECTS
Use the settings below as a guide, but you can play with them until it looks best for you.
(Click the settings pictured above to enlarge if needed)
That's it. We're done.
In those few simple steps you have created your own
Photoshop World.
Showing posts with label tutorial. Show all posts
Thursday, June 17, 2010
Saturday, May 29, 2010
Great New Photoshop Tips!
Well I apologize for not getting more great Photoshop Tips posted lately. But just because I didn't post, doesn't mean I wasn't thinking about you!
Truth is, so many of you who bought the Original Photoshop Tip Cards wrote in with suggestions on how they could be even better, I've spent the last month putting all your great suggestions to use. While y'all loved the tips, most of the changes you wanted centered around keeping the cards organized and easy to find when you needed them. While index cards have been in use for over 100 years, sometimes their "looseness" creates problems.
Great News!
Soon, you'll be hearing about the new, improved version of The Original Photoshop Tip Cards.
This new, improved format features 20% more material. It's jam-packed with easy to use new Photoshop tips to make creating stunning images faster and easier than ever.
Plus all your tips will stay in order in the new Plastic Comb Binder.
This new binding sytems along with a new table of contents assures you'll always find the exact tip you need when you need it. The comb binding also lets your cards lie perfectly flat while you work. Larger fonts let you easily read as you work. And, the flexible comb binding will let you add additional pages easily as they become available.
I'm just waiting on the printer now. If you're interested in getting your hands on this book, be sure to sign up at the right if you're not a member already. Joining is free and members are always the first to get the latest tips, updates, news and private special offers. So sign up today!
Stay tuned!
Truth is, so many of you who bought the Original Photoshop Tip Cards wrote in with suggestions on how they could be even better, I've spent the last month putting all your great suggestions to use. While y'all loved the tips, most of the changes you wanted centered around keeping the cards organized and easy to find when you needed them. While index cards have been in use for over 100 years, sometimes their "looseness" creates problems.
Great News!
Soon, you'll be hearing about the new, improved version of The Original Photoshop Tip Cards.
This new, improved format features 20% more material. It's jam-packed with easy to use new Photoshop tips to make creating stunning images faster and easier than ever.
Plus all your tips will stay in order in the new Plastic Comb Binder.
This new binding sytems along with a new table of contents assures you'll always find the exact tip you need when you need it. The comb binding also lets your cards lie perfectly flat while you work. Larger fonts let you easily read as you work. And, the flexible comb binding will let you add additional pages easily as they become available.
I'm just waiting on the printer now. If you're interested in getting your hands on this book, be sure to sign up at the right if you're not a member already. Joining is free and members are always the first to get the latest tips, updates, news and private special offers. So sign up today!
Stay tuned!
Tuesday, October 27, 2009
Shortcuts Are Less Scary
Photoshop can be a lot less scary to work with and a whole lot faster to use when you know a few simple shortcuts.Here are some commonly used keyboard shortcuts that are frighteningly simple to apply:
Alt-Backspace: will fill any layer completely with the foreground color shown on the pallet
Ctrl-Backspace: will fill any layer completely with the background color shown on the pallet
Alt-Shift-Backspace: will fill any pixel area with the foreground color...great if you've just drawn a shape with the marquee tool or selected a figure with the lasso tool. Could be useful for creating shadows too!
Ctrl-Shift-Backspace: will fill any pixel area with the background color.
And how about two useful text tips...
1. Say you've just created a line of text, but it's not positioned where you want it. You don't need to go out to the Move Tool (arrow). Simply grab the mouse and move the cursor away from your text.
Then, left click and drag your text to wherever you like.
2. You've positioned the text where you want it, but now you don't like the color. No problem. Simply move your cursor to the beginning or end of your text line, left click the mouse and drag across your text to highlight it. Now you can go up to the toolbar and click on colors to alter the one shown on screen.
OK, that's not really big news. But if you found it frustrating that you couldn't SEE the new color you selected because of the highlighting, stay tuned! I have a nice keyboard shortcut for you that will save you time and aggravation.
Press, Ctrl-H to temporarily turn off the visual highlighter so you can SEE your true text color.
That's all for today. See, nothing to be afraid of.
When you have a guide to walk you down the creepy dark corridors of Photoshop, it can actually be kind of fun! Let Photoshop Tip Cards be your great BIG FLASHLIGHT, lighting your path through the scary maze that Photoshop can become.
Monday, September 7, 2009
Free Tips, Free Cards, Free-For-All!
Happy Labor Day!I hope today finds you celebrating Labor Day by not doing much labor!
But instead, having FUN!
Today I want to help you do less work, Photoshop-wise, by giving you time-saving, work-saving tips.
Just a few short tips because I want time off too! And you don't want to spend all your time reading and trying to do difficult stuff today.
So here we go!
Text Tip #1... Normally when you click on the text icon (T), once you start typing a new layer is created. But if you're doing multiple text layers, often you start typing on an old layer where you didn't intend to.
Hold down the SHIFT key while you click on the T to guarantee you'll get a new text layer every time.
Text Tip #2... You often want to see several Font options before you select the one that's perfect for your project. The easiest way to do this is...
Type your text, highlight it, click in the FONT description box on the tool bar to highlight that, then just use the UP/DOWN arrow keys. As you scroll through it will automatically be changing your text.
Catchlights...Need a quick fix for giving life to those "dead" eyes that have no catchlight reflection? In the brush palette choose STAR 14 pixel. It actually looks like a slice of pie. Perfect for adding that sparkle to lifeless eyes.
Open a new layer, choose white for the color, size your brush then click to apply over the eye. Choose a layer blend mode that looks best, (overlay?) vary the opacity and viola! You've got eyes that dazzle!
OK, I promised to keep it short so you (and I) can go play.
But stay with me for this SPECIAL ANNOUNCEMENT!
I know following this Labor Day, many folks will have no job to go back to tomorrow. Layoffs are at astronomical levels. Many folks are wishing they had someway to restore the income they once enjoyed, someway to take care of their families, protect their homes and their health.
If you are one of those people, I have great news! Since you're here I'm guessing you must be familiar with Photoshop. And that leads me to believe you have a camera.
The great news is you need just one more thing (it's not expensive) to create your own Photography Business!
You need Scott Voelker's NewPhotoBiz 1.0
It has everything you need, all the tips, tricks and secret shortcuts for creating a PROFITABLE photography business...this week! Best of all you can download it and get started TODAY!
But it gets even better! To help you along even more, when you click the links on this page to read more and then order NewPhotoBiz 1.0 I'll send you a FREE deck of Photoshop Tip Cards!
Yes...a FREE deck of Photoshop Tip Cards, 52 cards packed with the best and most popular Photoshop edits, tips, tricks and secret shorcuts. I want you to have every advantage as you claim your independence and begin to restore your finances. I want to help you grow your own business so you never again have to depend on some company or boss to toss you crumbs.
Labor for yourself now! Labor for your family! Labor at something that's FUN!
Create beautiful portraits of children and pets in your community. With Scott's program, you'll have everything you need. Including his secret weapon forum described in the previous post.
Remember, to get your FREE card deck, (a $19.95 savings) you must order NewPhotoBiz 1.0 by following the links from this page. That's the only way for me to be notified of your purchase by Clickbank so that I can send you your FREE cards. Click here now to get started.
Monday, July 27, 2009
Draw Your Best with Photoshop
Many drawing tools, when used to their maximum potential, can help us get through our workload faster and be more creative too.Today I'll focus on tips for one tool that's used a lot, the marquee tool, and one that many are unsure of, the line and shape drawing tools.
Let's begin.
How to Draw Rounded Rectangles
Grab the rectangle Marquee tool and draw out your rectangle to size.
Go to SELECT -MODIFY - SMOOTH
A dialog box will pop up. Set the radius to determine how much to round the corners.
Start with 20 for most medium sized rectangles.
Larger sizes will obviously need a bigger radius, small sizes less.
=========================================================
How to Draw Perfect Squares
Grab the Rectangle Marquee tool
Hold down the SHIFT key as you draw for a perfect square
=========================================================
How to Draw Perfect Circles
Grab the Elliptical Marquee tool
Hold down the SHIFT key as you draw for a perfect circle
Tip: If you press the SPACEBAR before releasing any commands
(left mouse button or shift key) you can easily reposition your drawn shape by moving the mouse. Once you let go however, it's harder to adjust.
==========================================================
Draw Circle from the Center Out
To draw proportionally from the center out, hold down the Alt key in addition to the other commands. The circle will begin to draw outward from the start position of the cursor, rather than pull from the edge.
==========================================================
Draw a Straight Line
Grab a drawing tool (its the icon located directly under the TEXT (T) icon).
Choose the line tool, then hold down the SHIFT key to draw a straight line in the foreground color indicated.
( draw by left mouse clicking and dragging across the page)
Draw with other shapes as well, by right mouse clicking on the drawing tool icon, then select the shape. Position your cursor (looks like a +) on your workspace and drag to draw.
Once you get comfortable with the drawing tools you'll notice your speed will increase right along with your creative confidence.
Step-by-step instructions make it easy to create!
You wouldn't try to bake a cake or cookies from scratch without a recipe. Would you?
Photoshop Tip Cards are your recipe for success!
The Photoshop Tip Card Deck is your recipe for creating delicious photographs...the kind of photos all your friends and family will drool over! (Now there's a pretty picture!)
It's the simple way to start creating great photos, fast!
Be sure to get yours today at: http://photoshoptipcards.com
Wednesday, July 22, 2009
Worldwide Photo Walk 2009
Last Saturday, July 18th, more than 32,600 photographers set off on foot in 900 PhotoWalk events around the world.This was the second annual event put together by Scott Kelby and the National Association of Photoshop Professionals.
It's designed to bring pro and amateur photographers together to explore and exchange ideas in communities the world over. Groups of 50 local participants, lead by a team leader, head out on a two hour expedition to take photos within their designated territories.
This was my first event, and although I did not feel I had captured any photos which I should submit for the worldwide prize drawing (2 are allowed from each participant) I did meet some interesting folks...and get a lot of exercise!
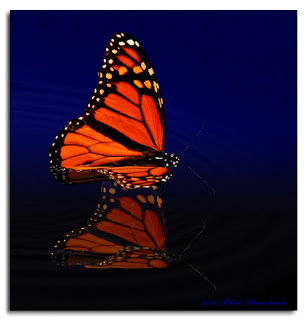
My educational discoveries for this week were how to create realistic looking Gold overlays (as shown on the text in the butterfly photo I took on the walk- above) and a reminder to always be sure to sharpen your photos...if not in the camera then certainly in post-processing.
I used to believe there were only two types of photos that could not be saved by Photoshop.
1.Photos that were "blown out", where extreme light areas left no detail, and
2. Photos that were blurry.
I've revised my thinking of late after discovering a plethora of effective techniques for removing, or should I say "correcting" blur. Of course if you sneeze while taking the photo, that kind of extreme blur will be your burden to carry. Sharpening has limits. But if it's that faint fuzziness that means an eye is not too clear, or your image appears a bit hazy...don't just toss it away.
Save it with one of the many sharpening tools available in Photoshop.
Here are a few I've posted previously or included in the tip card deck:
Sharpen with High Pass Filter
Sharpen with Gaussian Blur
The Unsharp Mask
Photoshop Tip Cards are shipping around the world thanks to my readers.
If you haven't gotten yours yet...what are you waiting for!
They truly are, "A Photoshop Seminar in Every Box!"
(only I saved you the high-priced fee...and took all the notes for you!)
There's still time. Start playing with a full deck today at:
http://photoshoptipcards.com
Monday, June 29, 2009
Play with a Full Deck

Just a quick note to let you know...
The full deck of Photoshop Tip Cards in now complete!
Now, you too can become an instant Photoshop wiz!
Now, with your own set of Photoshop Tip Cards, you can plow through a pile of pre-printing processes in no time too!
Finally!
There is a simple, low-tech way to get help for the popular Adobe Photoshop editor.
STOP!
Wasting hours with distracting searches on the internet, flipping between screens looking for help as you're trying to work!
DROP!
The time wasting trial and error attempts to remember how to do all the complicated adjustments!
ROLL!
Your creative powers into making eye-catching digital images FAST!
Your house will be on FIRE!
With productivity and imagination.
52 easy to use index cards show in simple terms exactly how to do all the most popular Photoshop edits, tricks and "secret" shortcuts. And thanks to input from our members, printing costs have been substantially reduced. You're going to love (and be amazed at) the price!
Start playing with a full deck!
Get more details or order yours today at:
http://photoshoptipcards.com
Christie said it best...
"I love, love, love your tip cards!"
PhotographybyChristie.net
Yes...they were designed by me for YOU!
Made right here in Buffalo, NY USA!
"Like a Photoshop seminar in every box"
(Only I saved you the high-priced fees and took all the notes for you!)
Subscribe to:
Posts (Atom)