Showing posts with label photoshop tutorial. Show all posts

Wednesday, December 15, 2010

Text... Your Way!


Text...options beyond the Photoshop menu.

Many times you'd like to have your text in bold, or italics, but the options aren't offered in the Photoshop selection dropdowns. If you accept these limitations, you'll be forced to compromise.

But it doesn't have to be this way! You can have it YOUR WAY!

In the case of italics, you simply type your text, then right click on the text layer in your layers palette and select RASTERIZE LAYER. That will change your "text" into a "shape". (Be sure your spelling is correct because after you rasterize you can no longer change the individual letters or font without starting over).

Once your layer has been RASTERIZED (turned into a Photoshop shape) you can then use EDIT>FREE TRANSFORM to slant your text into italics. Hold down the Ctrl key as you drag your top corners to the right and you can achieve any degree of italic slant.

BOLD text can be achieved by simply making a copy of your text layer and changing the BLEND MODE on your new (top) text layer to MULTIPLY. And/Or, you can use the same method we used for italics, RASTERIZE to create a shape layer and then use TRANSFORM to make it just a bit larger too.

Photoshop gives us a lot of great gifts to work with, but it's nice to know we can still exchange them for what we really want. Options...who among us would not like more?

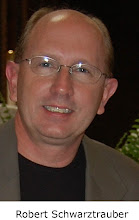
Robert Schwarztrauber

Reminder...Only a few days left to get your "Photoshop Recipe Card" book in the FREE Holiday Gift Box. Order by this Sunday (Dec. 19) to insure delivery by Christmas.

Saturday, October 23, 2010

Yesterday I promised if you stayed tuned I'd have a great Photoshop deal for you.

Shane Goldberg, an expert Photoshop teacher,
sent me an email the other day I knew I'd
have to share with everyone.

Rather than drone on, he's given me permission
to share that email with my readers here...
================================
Hi Bob,

I need your help.

I've got 600 Photoshop Elements Training DVD's in my garage.
I HAVE to get rid of them (for a number of reasons) NOW!!!

They were selling for $89.95 but they're getting older now
and there's new versions of Elements out now etc.

Anyway, here's the link it's directly to Paypal.
https://www.paypal.com/cgi-bin/webscr?cmd=_s-xclick&hosted_button_id=MWEBZDCDCEQF6

I want you to have one even if you don't own Elements as
there are 85+ video tutorials on there, practice images
and the DVD is a GREAT Christmas present! (it's shrink wrapped
and professionally produced)

So for $10 that will cover my shipping and you get yourself
a killer DVD for yourself or someone special ;)
https://www.paypal.com/cgi-bin/webscr?cmd=_s-xclick&hosted_button_id=MWEBZDCDCEQF6

Have a great day, Hope you can help me out!

Thanks heaps,
Shane
PhotoshopZoo.com

p.s. You can order as many as you want, i've got stacks of them!

p.p.s if you have any questions let me know shane@photoshopzoo.com

=======================================================
He says...


This DVD includes...

85+ Awesome Video tutorials on everything from:

    * Organizing & Tagging your photos
    * The Tool palette (all about the tools!)
    * Tips, Tricks & more cool stuff
    * Color - Hue & Saturation (color adjustments)! Very cool
    * Layers, Layer Masks etc.
    * Digital Photo Editing
    * Cool Effects in Elements
    * and Productivity Techniques....

That's it over 6 hours of awesome video tutorials

=============================================

Looks like a great deal to me!
I got mine without hesitation.

For $10...how could you go wrong?
You'd have to learn something right?

Just to be upfront, there's nothing in this deal for me.
I have no ties to Shane, monetarily or otherwise, beyond
my respect for his work. I just thought it was a deal
that was too good for any Photoshop student (and aren't
we all really?) to pass up.

But, he's movin' them out before his wife does
it for him. So this offer won't last long.

Stretch your ten dollars and get this DVD.
Here's the link once more:
https://www.paypal.com/cgi-bin/webscr?cmd=_s-xclick&hosted_button_id=MWEBZDCDCEQF6

by Robert Schwarztrauber

Thursday, June 17, 2010

Know Shadows

Shadows.

Like so many things in Photoshop there
are numerous ways to create a shadow
effect.

Previous I had discussed duplicating the object, desaturating, blurring and putting on a layer under your subject. Then adjusting with the move tool.

That method works great.

But sometimes you just want a quick and easy little touch of shadow.

And that's where the oft forgotten "BEHIND" brush mode comes in.

Most often we use the brush tool in its default mode of NORMAL.

But right next to your brush tool selection box is the MODE selection drop-down box. In there you will find the option of BEHIND which will let you paint behind something. Perfect for shadows. BEHIND mode lets you paint but the paint will only show where there are no opaque pixels.

If you already have a transparent background you're all set. Just go ahead and use the brush to paint in your shadow. Set the brush to a very soft edge and an opacity of about 30%. I used a soft square brush for the example above.

Sometimes, as was the case with this example, you need to first move your shadow subject onto its own transparent layer. Then you can go ahead and paint in your shadow. If you were to try to paint on the original that has a  white background (completely opaque) when you try to brush you will see nothing happening. Remember, in BEHIND mode the brush will only paint where the area is transparent. It will not paint over opaque (in this case white) pixels.

It's not for every case. But sometimes you just need a quick shadow technique. Maybe you can think of other uses for this cool, paint behind technique?_

Be sure to click on the example above for setting and layer details.

Photoshop World

Need a planet...fast? 

Or a tie dyed shirt?

Quick background?

Here's the fastest way
to get everything you need
with just a few clicks.


 First, on your color pallet, select two contrasting colors.

Here I used a light and dark blue for the rear. A light and dark red-ish color for the front orb.

Once you have those, open a new layer and use:
FILTER > RENDER > CLOUDS

If you needed a quick background you can stop here. You have it.

If you needed an overlay for some clothing or perhaps a little sky character, you can stop here too. It's just that fast!

If you wanted a planet, there's one more step.

Go to FILTER > RENDER > LIGHTING EFFECTS
Use the settings below as a guide, but you can play with them until it looks best for you.


(Click the settings pictured above to enlarge if needed)

That's it. We're done.

In those few simple steps you have created your own
Photoshop World.