 Unfortunately, we can't always get our subjects and our scenes in the same place at the same time.
Thankfully, we have Photoshop to fix that problem!
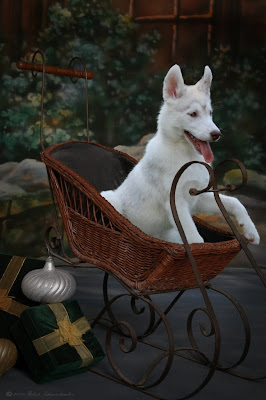
Case in point, my daughter's husky puppy looks just adorable with this sleigh (from NewPhotoBiz 1.0). Sitting in, rather than pulling it!
Originally, the puppy was photographed outdoors, in the backyard. The background was green grass and bushes.
The challenge was to remove said dog from the green grass to create a clean image that could be transferred to this sleigh scene.
If you've ever tried to cut fur from grass cleanly I know you're going to love this tip. A tip I got from Scott Voelker, creator of the NewPhotoBiz 1.0 program.
(Click On Photo Above for a Better View of Details)
Here it is...use the background eraser tool. The key is to set the parameters. Here's what I use:
Protect Foreground Color...check the box, this allows the eraser tool to cut out (delete, erase) anything that is not the color you select. In this case, I would use the eyedropper to click on an area of white fur to set the foreground color (protection). Sometimes, depending on your lighting and subject, you'll need to keep changing the foreground color you're protecting as you move around your subject. Like here when I cut around her pink tongue, I had to reset my foreground color to match her tongue, rather than her white fur. Then, once past, I returned the foreground color to white to protect her fur.
Tolerance. I set mine here at 50%. This tells PS how close to your foreground color it must protect. Since the fur color does vary a bit in white colors, but is very different from the green grass I want to erase, 50% worked well. However, if you're trying to cut out say a girls green dress from green grass, you might want to work with (set) a little less tolerance, say only a 10% tolerance (or variation) so PS doesn't confuse the grass with the dress and accidentally erase the dress too. Test, use "undo" to go back if you find it's erasing more than you want it to.
Limits. This will depend a lot on what you're working on. For fine detailed cutting in a photo where the colors vary greatly as in this puppy example, FIND EDGES will likely work best. If you have a lot of solid colors, perhaps Contiguous (connected) of Discontiguous (separated) might be faster for you
Sampling. In cutting out hair (or fur) I find that setting it to ONCE works best. Set it to the hair color and work around your subject.
Once you have your parameters set, chose a brush that works best for your situation, I usually start with a feathered brush, and start mouse-clicking that brush around the edges of your subject. If you've done it right, like magic it erases everything from around your subject, yet leaves even the finest hairs and whiskers! You might have to go around again to catch any stubborn areas, or use one of those spikey brushes to get into awkward areas.
Coming Next...Ever drag a subject from one photo into another and then wish you could change something about that layer. Maybe it's too light, too dark, not sharp enough. But you don't want to damage it, or go back to your original to fix it then move it back over?
Quick 3 second fix...next post!

No comments:
Post a Comment