Monday, July 27, 2009

Draw Your Best with Photoshop

Many drawing tools, when used to their maximum potential, can help us get through our workload faster and be more creative too.

Today I'll focus on tips for one tool that's used a lot, the marquee tool, and one that many are unsure of, the line and shape drawing tools.

Let's begin.
How to Draw Rounded Rectangles

Grab the rectangle Marquee tool and draw out your rectangle to size.
Go to SELECT -MODIFY - SMOOTH
A dialog box will pop up. Set the radius to determine how much to round the corners.
Start with 20 for most medium sized rectangles.
Larger sizes will obviously need a bigger radius, small sizes less.
=========================================================
How to Draw Perfect Squares

Grab the Rectangle Marquee tool
Hold down the SHIFT key as you draw for a perfect square
=========================================================
How to Draw Perfect Circles

Grab the Elliptical Marquee tool
Hold down the SHIFT key as you draw for a perfect circle

Tip: If you press the SPACEBAR before releasing any commands
(left mouse button or shift key) you can easily reposition your drawn shape by moving the mouse. Once you let go however, it's harder to adjust.
==========================================================
Draw Circle from the Center Out

To draw proportionally from the center out, hold down the Alt key in addition to the other commands. The circle will begin to draw outward from the start position of the cursor, rather than pull from the edge.

==========================================================
Draw a Straight Line

Grab a drawing tool (its the icon located directly under the TEXT (T) icon).
Choose the line tool, then hold down the SHIFT key to draw a straight line in the foreground color indicated.
( draw by left mouse clicking and dragging across the page)

Draw with other shapes as well, by right mouse clicking on the drawing tool icon, then select the shape. Position your cursor (looks like a +) on your workspace and drag to draw.

Once you get comfortable with the drawing tools you'll notice your speed will increase right along with your creative confidence.

Step-by-step instructions make it easy to create!

You wouldn't try to bake a cake or cookies from scratch without a recipe. Would you?

Photoshop Tip Cards are your recipe for success!

The Photoshop Tip Card Deck is your recipe for creating delicious photographs...the kind of photos all your friends and family will drool over! (Now there's a pretty picture!)

It's the simple way to start creating great photos, fast!
Be sure to get yours today at: http://photoshoptipcards.com

Friday, July 24, 2009

Photoshop Filters - Bring Out the Artist in You

One of my favorite things about Photoshop is that it lets me choose between being a photographer and being an artist.

Being a photographer I'm pretty comfortable with. I feel I can handle a camera as well as most, although I'm constantly reminded by those more seasoned, that I still have a lot to learn. And I accept the challenge.

As far as being an artist? Not so good. I used to dabble at painting...and it always looked like a dabble. From that experience I learned that if I wished to express my vision, I'd better put down the brush and go get my camera.

Now, Photoshop let's me be both!

Truth be told...sometimes I don't take a great picture. Shhhh!

But when I draw upon the powers of Photoshop, that same, not-so-great photo can become a really wonderful piece of art to display.

This one here is an example. Overall, the photo was a decent "snapshot". But it really wasn't as crisp and clear as I would have liked and I wasn't happy with the look of the water.

So here's what I did.

I cut the girl from the photo and added a color-tinted (pinkish) gradient overlay across the water and then lightened the top, right corner to give it a more of a sunset feeling.

Next, I returned the young lady to the photo and then applied a filter over the entire photo that I thought appropriate, Ocean Ripple. (Filter - Distort - Ocean Ripple) Now it had that artsy, canvas look. (which worked really well to hide the lack of clarity!)

With minimal blending, using the non-destructive layer-mask dodge and burn method, the photo was complete. Except for the addition of a complimentary frame, created using the technique found in Fool-Proof Frames.

And viola! In just a few minutes time I changed a so-so photo to a wonderful piece of art!

Photoshop lets you save some really marginal pictures and turn them into something to treasure.

Next time you have a photo that you wished was sharper, better colored, or just lacks that certain something, consider saving it with one of the many creative filters available in Photoshop. Have fun and experiment.

Who knows? Photoshop might let you be an artist too!

Wednesday, July 22, 2009

Worldwide Photo Walk 2009

Last Saturday, July 18th, more than 32,600 photographers set off on foot in 900 PhotoWalk events around the world.

This was the second annual event put together by Scott Kelby and the National Association of Photoshop Professionals.

It's designed to bring pro and amateur photographers together to explore and exchange ideas in communities the world over. Groups of 50 local participants, lead by a team leader, head out on a two hour expedition to take photos within their designated territories.

This was my first event, and although I did not feel I had captured any photos which I should submit for the worldwide prize drawing (2 are allowed from each participant) I did meet some interesting folks...and get a lot of exercise!

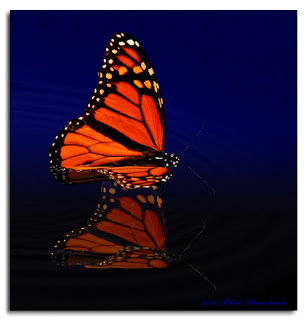
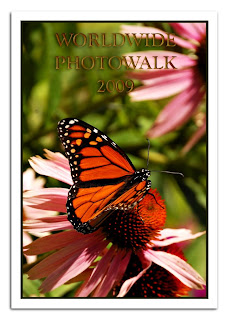
My educational discoveries for this week were how to create realistic looking Gold overlays (as shown on the text in the butterfly photo I took on the walk- above) and a reminder to always be sure to sharpen your photos...if not in the camera then certainly in post-processing.

I used to believe there were only two types of photos that could not be saved by Photoshop.
1.Photos that were "blown out", where extreme light areas left no detail, and
2. Photos that were blurry.

I've revised my thinking of late after discovering a plethora of effective techniques for removing, or should I say "correcting" blur. Of course if you sneeze while taking the photo, that kind of extreme blur will be your burden to carry. Sharpening has limits. But if it's that faint fuzziness that means an eye is not too clear, or your image appears a bit hazy...don't just toss it away.

Save it with one of the many sharpening tools available in Photoshop.

Here are a few I've posted previously or included in the tip card deck:
Sharpen with High Pass Filter
Sharpen with Gaussian Blur
The Unsharp Mask

Photoshop Tip Cards are shipping around the world thanks to my readers.

If you haven't gotten yours yet...what are you waiting for!
They truly are, "A Photoshop Seminar in Every Box!"
(only I saved you the high-priced fee...and took all the notes for you!)

There's still time. Start playing with a full deck today at:
http://photoshoptipcards.com
Friday, July 10, 2009

Cut, Paste, Blend with Ease

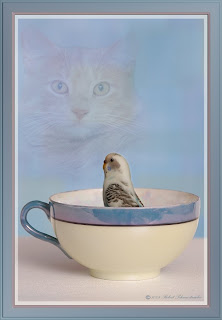
After posting my parakeet/cat photo I was asked, "How'd you blend the cat into the background so well?"

I'll start by saying that I hate the eraser tool for all but the roughest cutouts. Maybe it's a guy thing, but it seems to involve too much commitment! Once you erase it -it's gone. (except for a lengthy history backtracking)

For most "erasing" I prefer to use a Layer Mask.

While on the active layer (the one you want to blend or "erase")
click on the Layer Mask icon (second from the left on your layers pallet, gray square w/circle). This will create an invisible mask over your image based on the background color currently selected. If you show WHITE as your default background, your mask will appear WHITE next to your image on the layers pallet.

The "magic" is, if you now paint with a BLACK brush while on your WHITE mask, your image will be "erased". In other words you won't see your image through the mask. It is still there, but your mask won't let you see it.

It really becomes a non-destructive erasing. And you can vary the opacity of the brush to better control how much you "erase". Or a better term would be "hide". Lowering the opacity toward the outer edges can help you BLEND your image very smoothly.

Here's the best part for me, you're not committed! If you find that you've gone too far, you can paint with the opposite color to get your image "un-masked". So if you painted with BLACK to hide your image, paint over again with WHITE (the same color as your Layer Mask) to return your image to view. You can vary that WHITE opacity too if you just want to bring a little of your image back into view.

Here's a screen shot of how the parakeet/cat photo was created.

[image]

If you look at the cat, Layer 2, you see the cat cutout and to the right of it is the layer mask (WHITE). Then you see a circle of BLACK that was painted on around the outer edges of the cat, in varying opacities. When you look at the big photo preview you can't see those area behind the black. You only see what I want you to see.
And that is the area in the center, the cat's face -which is still WHITE on the mask.

Using soft-edged brushes, of varying opacities on a Layer Mask can really help you Blend images from one photo to another.

In this photo, in order to make the cat appear "dreamy" (or nightmarish as some would argue!) I simply changed the BLEND MODE to Soft Light at 70% after completing the mask.

Start using a Layer Mask to blend instead of the Eraser tool. You'll gain much more control and better looking images too!