Today I want to introduce you to Scott. Scott has created waves of cash at will using a simple system involving Photoshop Props he and his wife designed. The best thing for you and me is, he bought all the props, he photographed all the props, he designed the simple Photoshop Cut-out templates... and now we get to just pop any of our images into his templates to create stunningly cute photographs that parents are eager to drop big money on.
It could easily double you profits in a year I think. With minimal work on your part. Very minimal! He's making his program NewPhotoBiz Lite available once again ...after selling out the last 3 or 4 launches!
If you missed out before, or are being introduced to the this for the first time you won't want to miss this!
Scott has put together a series of FREE videos to show you the power of the NewPhotoBiz program.
As an additional bonus to you, when you sign up to receive the FREE Photoshop Tip Cards (over there on your top right), I'll send you the link to his series.
Even if you're not interested in boosting your business, you'll still get great FREE Photoshop tips from Scott. Go sign up now...you have everything to gain...nothing to lose!
Now let's go Photoshop something!
Robert Schwarztrauber
Sunday, March 29, 2009
Monday, March 16, 2009
Fool-Proof Frames and Mats
Thanks for checking back!
As promised, here's a quick and easy way to dress up your photos with fool-proof frames and mat borders.
Two things I love about this technique is that the color always matches, compliments or "goes with" your photo because you got the color using the eyedropper tool to select it right from the picture background. The other thing I like is it's fast...takes less than 2 minutes to do.
Here's a bonus feature...you can stack them and/or resize them for different effects! And, with a little more massaging, you can use the same technique to make objects appear to float off the page. (I'll show that one another time and put it on a card)
So if you're ready to begin, here goes...
1. Complete all the color and level adjustments on your photo and crop it to size. For our purpose here, I'll assume you are starting with a 4x6.
2. Go to IMAGE - CANVAS SIZE : add 1 inch to the width and height
(ie. change to 5x7) Note: In the anchor area, the default center box should be white with all the arrows pointing out
3. With the PAINT BUCKET tool selected, use the eyedropper to pick a color from your photo (background) that you wish to use for your frame. Suggestion: If you have the default white frame around your photo after enlarging the canvas size, you will want to chose darker colors from your background for the frame. Since it uses a gradient, lighter colors tend to lose effect.
4. ADD LAYER, then using the MARQUEE tool (rectangle) drag it to cover the 5x7 image.
5. Use the PAINT BUCKET to fill the area with color over your photo. Now all you see is solid color and the "dancing marquee ants"
6. SELECT - MODIFY - BORDER : set the border to the maximum 200 pixels (just a guide, you can vary the effect (width of frame) as you prefer).
7. SELECT - INVERSE : use the delete key on your keyboard to remove the colored area over your photo and viola! You have a beautiful framed print!
Use your favorite save technique to store your image.
Once you try this it's like potato chips...you can't have just one! You'll be dragging out all your old photos to dress them up as well. This "QUICK TIP" will now have you at the computer for hours! Sorry.
Until next time... Go Photoshop Something!
Robert Schwarztrauber, photographer
Sharing My Tips On Photoshop
Many have asked how I get through so many Photoshop edits so quickly. To answer that I decided to share my secret with y'all here on this blog.
The answer: Cards.
I'm not an expert in Photoshop by any means. But when I learn a new "trick" I jot down the essential points in the process. Then, when I am looking to do a particular task later, I can remember (look up) what the heck I'm supposed to do.
There are just so many sites out there that offer free Photoshop tips (and I thank them profusely!) but it's time consuming to have to go back weeks or months later to research what you've already done...if only infrequently.
That's why I started jotting down notes. Notes everywhere.
And that worked great for a while, until I started losing my notes.
Normally I love all things computer. It's amazing the power at your fingertips. But sometimes I find the old ways are still the best. For organizing my Photoshop tips, index cards were the answer. And here's why:
I'll be sharing the tips on those cards, like the ones used to make the photo included here, in subsequent posts on this blog. So I hope you'll return often.
If you're in a hurry though, and seek semi-instant gratification, I'll be making a mini-pack of those cards available FREE, right here on this blog. Just as soon as I figure out how to get a sign-up widget going. Until then...
Go Photoshop Something!
(or, if you got time on your hands, "Google" me to find other helpful blogs and photos.
Robert Schwarztrauber, Photographer
The answer: Cards.
I'm not an expert in Photoshop by any means. But when I learn a new "trick" I jot down the essential points in the process. Then, when I am looking to do a particular task later, I can remember (look up) what the heck I'm supposed to do.
There are just so many sites out there that offer free Photoshop tips (and I thank them profusely!) but it's time consuming to have to go back weeks or months later to research what you've already done...if only infrequently.
That's why I started jotting down notes. Notes everywhere.
And that worked great for a while, until I started losing my notes.
Normally I love all things computer. It's amazing the power at your fingertips. But sometimes I find the old ways are still the best. For organizing my Photoshop tips, index cards were the answer. And here's why:
- Tip Cards sit on my desk, in a box so I can refer to them quickly without disrupting my workflow on the computer. (Flipping screens has me "flipping out" in no time.)
- Once I've found a cool tip or shortcut, I never have to remember how to do it. I have a my Tip Card "remember" for me!
- Saves countless hours "surfing the net" trying to look-up techniques I would have forgotten.
- I can shuffle through my Tip Card deck any time I feel my output is getting boring. I'm quickly reminded of a technique I hadn't used in awhile.
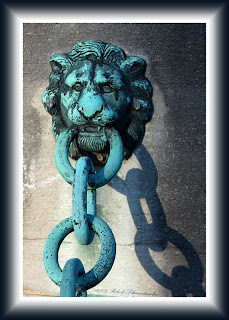
I'll be sharing the tips on those cards, like the ones used to make the photo included here, in subsequent posts on this blog. So I hope you'll return often.
If you're in a hurry though, and seek semi-instant gratification, I'll be making a mini-pack of those cards available FREE, right here on this blog. Just as soon as I figure out how to get a sign-up widget going. Until then...
Go Photoshop Something!
(or, if you got time on your hands, "Google" me to find other helpful blogs and photos.
Robert Schwarztrauber, Photographer
Subscribe to:
Posts (Atom)